
Picture a Sunday afternoon where the air in your kitchen is thick with the scent of toasted malt and sizzling poultry fat. You are about to master the ultimate centerpiece. While the grill usually gets all the glory, the real magic happens when you master beer can chicken recipes oven techniques to achieve that impossible balance of shatteringly crisp skin and succulent, steaming meat. This method relies on vertical roasting to ensure even heat distribution while the liquid inside the can creates a localized convection current of moisture. It is not just a gimmick; it is a calculated engineering feat that turns a standard bird into a masterpiece of texture and flavor. By the time we are done, you will understand exactly how the Maillard reaction interacts with localized humidity to create the best chicken you have ever tasted. Let us get your kitchen smelling like a five-star rotisserie.
The Gathers:
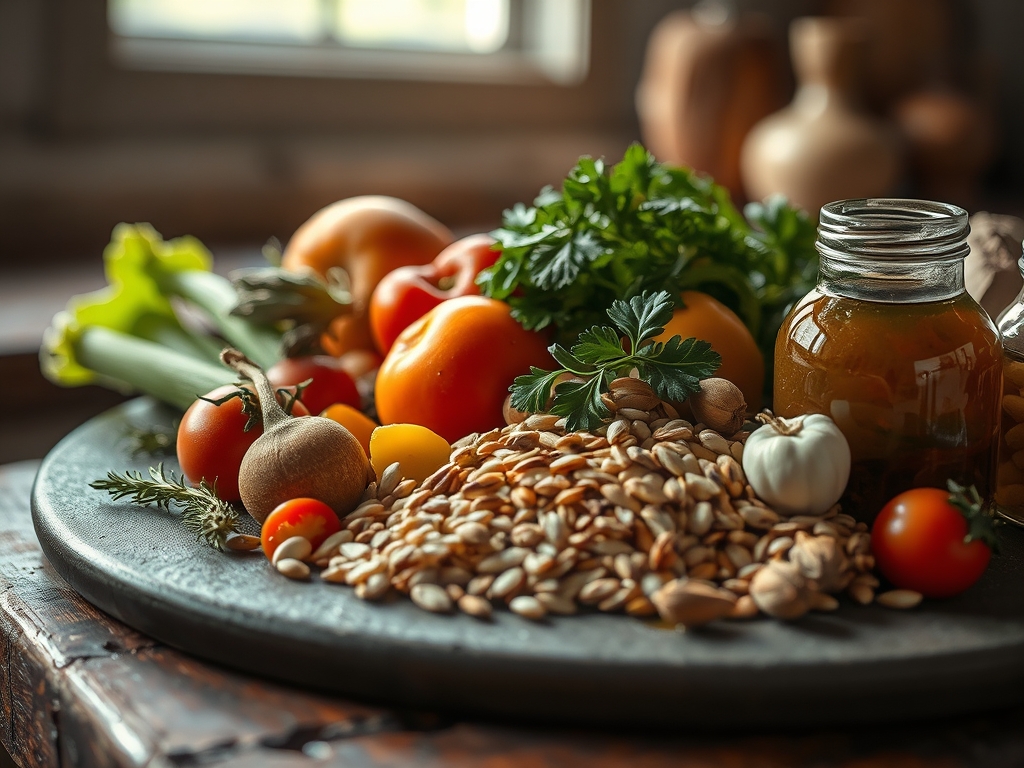
To begin, you need a four-pound organic roasting chicken. Look for a bird with intact, taut skin; this is your canvas for the Maillard reaction. For the aromatics, gather a high-quality dry rub. I prefer a blend of smoked paprika, garlic powder, onion powder, and dried oregano. You will also need a fat source to act as a binder; a high-smoke-point oil like avocado oil or clarified butter works best.
The star of the show is a 12-ounce can of lager. The beer should be at room temperature to prevent a thermal shock that could stall the cooking process. If you are looking for smart substitutions, you can swap the beer for a can of hard cider for a piquant sweetness or even a ginger ale for a spicy, aromatic profile.
In terms of tools, reach for your digital scale to weigh your spices for consistency. You will also need a heavy-bottomed skillet or a cast-iron pan to act as the base for the chicken; this provides a stable foundation and catches the precious drippings for a future gravy. A pair of sturdy tongs and a microplane for zesting fresh citrus into your rub will elevate the flavor profile from basic to professional.
The Clock
The "Chef's Flow" for this recipe is all about timing and temperature management. Expect about 20 minutes of active prep time. This includes patting the bird dry, applying the rub, and prepping the can. The actual roasting time in the oven will take approximately 75 to 90 minutes, depending on the precise weight of your bird.
Crucially, you must factor in a 15-minute resting period after the chicken leaves the oven. This allows for thermal carryover, where the internal temperature continues to rise slightly while the muscle fibers relax, reabsorbing the juices. Total time from fridge to table is roughly two hours. Do not rush the process; the chemical transformation of collagen into gelatin requires sustained heat.
The Masterclass
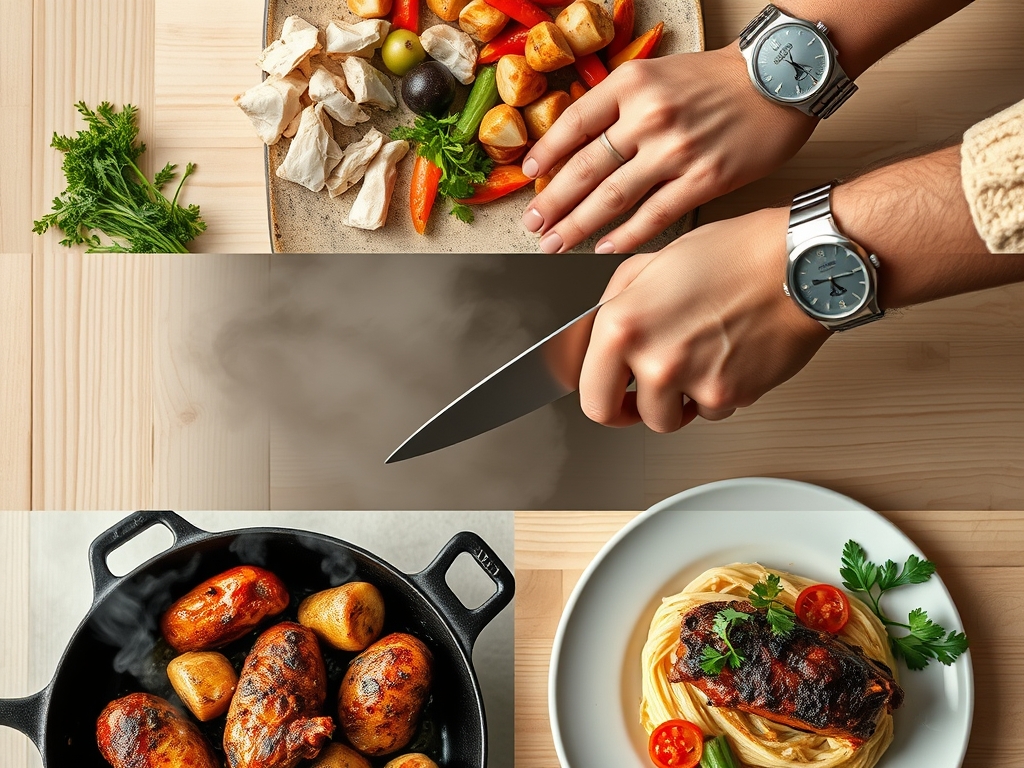
1. The Desiccation Phase
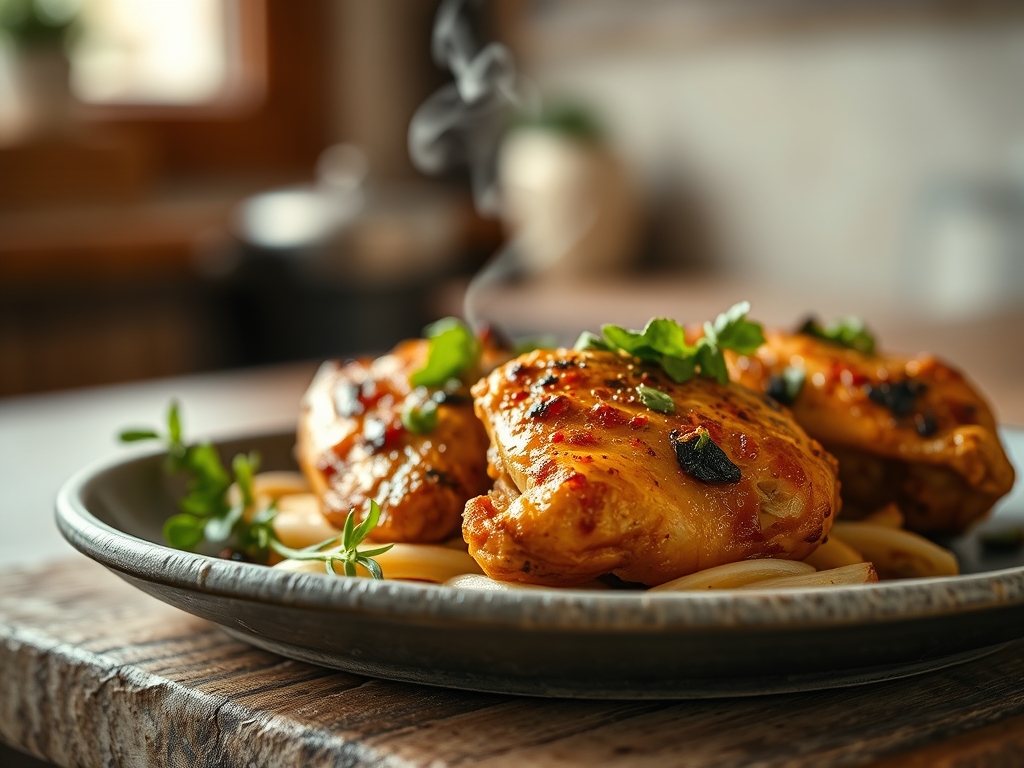
The secret to crispy skin is removing every molecule of surface moisture. Use paper towels to pat the bird inside and out until the skin feels tacky.
Pro Tip: This promotes enzymatic browning. Moisture is the enemy of the crunch; if the skin is wet, it will steam rather than sear, leaving you with a rubbery texture.
2. The Rub Application
Apply a thin layer of oil using a pastry brush, then liberally coat the bird with your spice blend. Use your fingers to get the rub under the skin near the breast.
Pro Tip: Salt acts as a denaturant. It breaks down the tightly wound proteins in the meat, allowing them to retain more water during the high-heat roasting process.
3. The Can Insertion
Open your beer can and pour out (or drink) about a third of it. Add a few cloves of smashed garlic and a sprig of rosemary into the can to infuse the steam. Carefully lower the chicken onto the can so it sits upright.
Pro Tip: This vertical orientation allows for 360-degree hot air circulation. The liquid inside the can reaches a simmer, creating a viscous steam that hydrates the interior of the bird while the outside crisps.
4. The Oven Placement
Position your oven rack at the lowest level to accommodate the height of the bird. Place the skillet containing the chicken into a preheated 375-degree Fahrenheit oven.
Pro Tip: Using a heavy-bottomed skillet ensures that the heat radiating from the bottom of the oven is distributed evenly, preventing the bottom of the chicken from scorching before the top is done.
5. The Temperature Check
Around the 60-minute mark, use a digital meat thermometer to check the thickest part of the thigh. You are looking for 165 degrees Fahrenheit.
Pro Tip: Be mindful of thermal carryover. If you pull the bird at 160 degrees, the residual heat will naturally bring it to the food-safe 165 degrees while it rests, preventing overcooking.
6. The Rest and Carve
Once finished, use your tongs to carefully lift the chicken and can off the skillet. Let it rest on a cutting board for 15 minutes before removing the can and carving.
Pro Tip: Resting allows the internal pressure to equalize. If you cut it immediately, the viscous juices will flood the board, leaving the meat dry and fibrous.
The Deep Dive
From a macro perspective, this dish is a protein powerhouse. A standard serving provides roughly 30 grams of protein with moderate fat content, depending on whether you consume the skin. For dietary swaps, Keto followers can stick to the recipe as is, while those seeking a Gluten-Free version should ensure their beer or cider choice is certified GF. For a "vegan" aesthetic version, one could use a large head of cauliflower basted in similar spices, though the steaming mechanic differs.
The Fix-It: Common Pitfalls
- The Tip-Over: If your bird feels unstable, create a "tripod" using the two legs and the beer can. You can also place the can inside a small cake tin for extra security.
- Burned Spices: If the rub is browning too fast, loosely tent the top of the chicken with foil. This deflects direct radiant heat while allowing the convection to continue.
- Soggy Bottom: Ensure the bird is not sitting in a pool of its own juices. Using a skillet with a small wire rack inside can elevate the bird further to aerate the base.
For meal prep, reheating is a science. Avoid the microwave, which turns the skin into wet paper. Instead, use a toaster oven at 350 degrees for 10 minutes to re-render the fats and restore the "day-one" crunch.
The Wrap-Up
Mastering beer can chicken recipes oven style is a rite of passage for any home cook looking to blend whimsy with serious culinary technique. By focusing on the physics of vertical roasting and the chemistry of the Maillard reaction, you have transformed a simple bird into a gourmet feast. The skin is a golden, crackling shield, and the meat is a testament to the power of steam infusion. Now, grab your bench scraper to tidy up the board, pour a glass of whatever is left in the fridge, and enjoy the fruits of your scientific labor.
The Kitchen Table
Can I use an empty can filled with water?
Yes, you can use an empty soda can filled with water, wine, or stock. The primary goal is creating steam to hydrate the meat from the inside out. The beer adds subtle malty notes, but the moisture is the essential element.
What if the chicken is too tall for my oven?
If your oven space is limited, try using a shorter 8-ounce "pony" can or a specialized low-profile vertical roaster. You can also place the roasting pan directly on the oven floor if your manual permits, though the bottom rack is safer.
How do I get the skin extra crispy?
For maximum crunch, leave the chicken uncovered in the refrigerator for 4 to 24 hours before cooking. This "dry brining" process dehydrates the skin completely, allowing the fats to render more efficiently and creating a glass-like texture once roasted.
Is the plastic lining inside the can safe?
Most modern cans have a thin liner, but at 375 degrees, the liquid inside keeps the can temperature around 212 degrees. This prevents the liner from melting. If you are concerned, use a stainless steel vertical roaster designed for this specific purpose.