
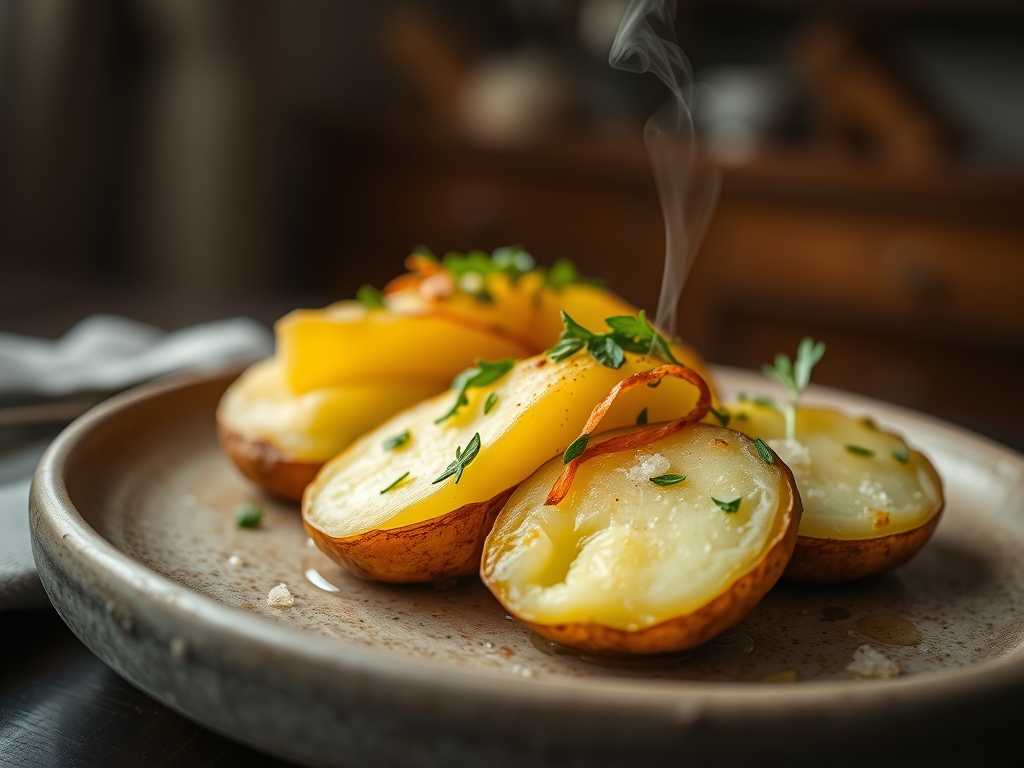
Imagine the scent of cold, cultured butter hitting a searing hot cast iron surface. It is that specific, nutty perfume of the Maillard reaction that turns a humble tuber into a masterpiece. We are moving beyond the basic boiled spud and into the realm of high-end gastronomy. These butter potato recipes are designed to transform your kitchen into a bistro; utilizing fat as a flavor carrier to ensure every bite is silky and decadent. Whether you are craving the glass-like crunch of a fondant or the cloud-like fluff of a Parisian mash, the secret lies in the chemistry of starch and lipid emulsion. We are going to master the art of the golden crust and the creamy center. Get your apron on; we are about to make magic with the most versatile ingredient in your pantry.
The Gathers:
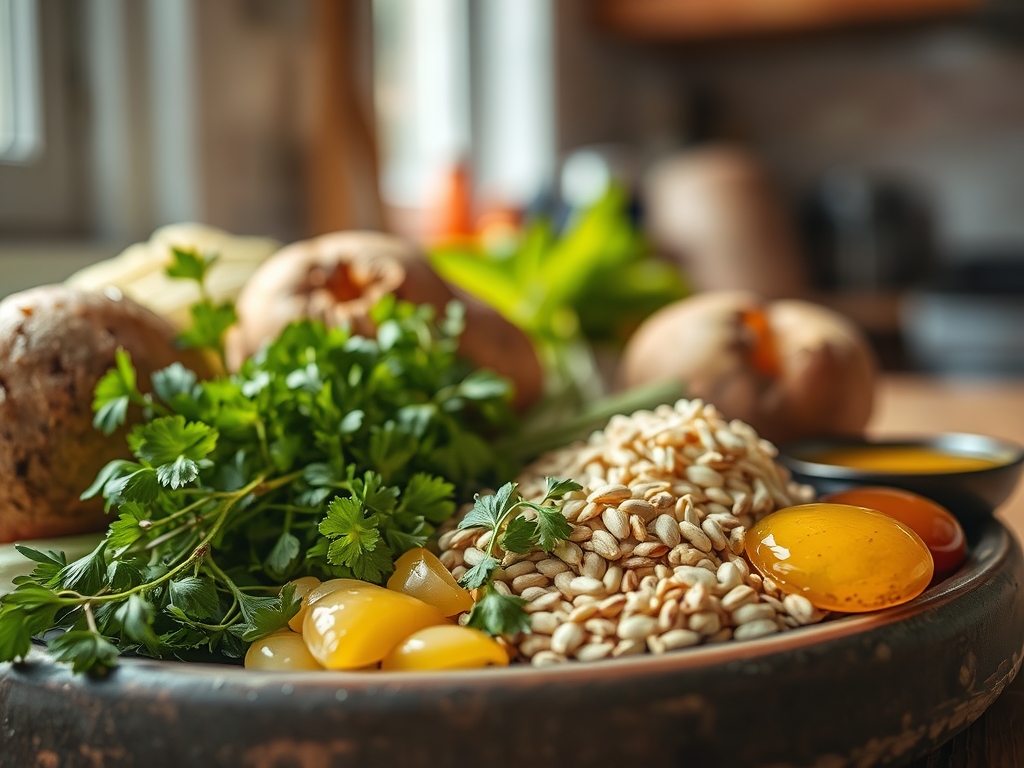
To achieve professional results, your mise-en-place must be precise. Start with high-starch varieties like Yukon Gold or Russet. Yukon Golds contain a natural buttery yellow pigment and a mid-range starch content that holds its shape during roasting. You will need high-quality European-style butter; look for brands with at least 82 percent butterfat. This higher fat-to-water ratio ensures a more viscous sauce and better browning.
Gather your aromatics: fresh rosemary, thyme, and unpeeled garlic cloves. The garlic will infuse the fat without burning. You will also need coarse kosher salt for abrasive seasoning and a bottle of high-smoke-point oil to stabilize the butter.
Smart Substitutions: If you are out of fresh herbs, a pinch of dried herbes de Provence works, but add it to the butter early to rehydrate. For a dairy-free version, use a high-quality vegan block butter made from cashew or coconut oil to mimic the saturated fat profile. If you want a piquant kick, swap standard salt for smoked Maldon sea salt or a dusting of nutritional yeast for umami depth.
The Clock
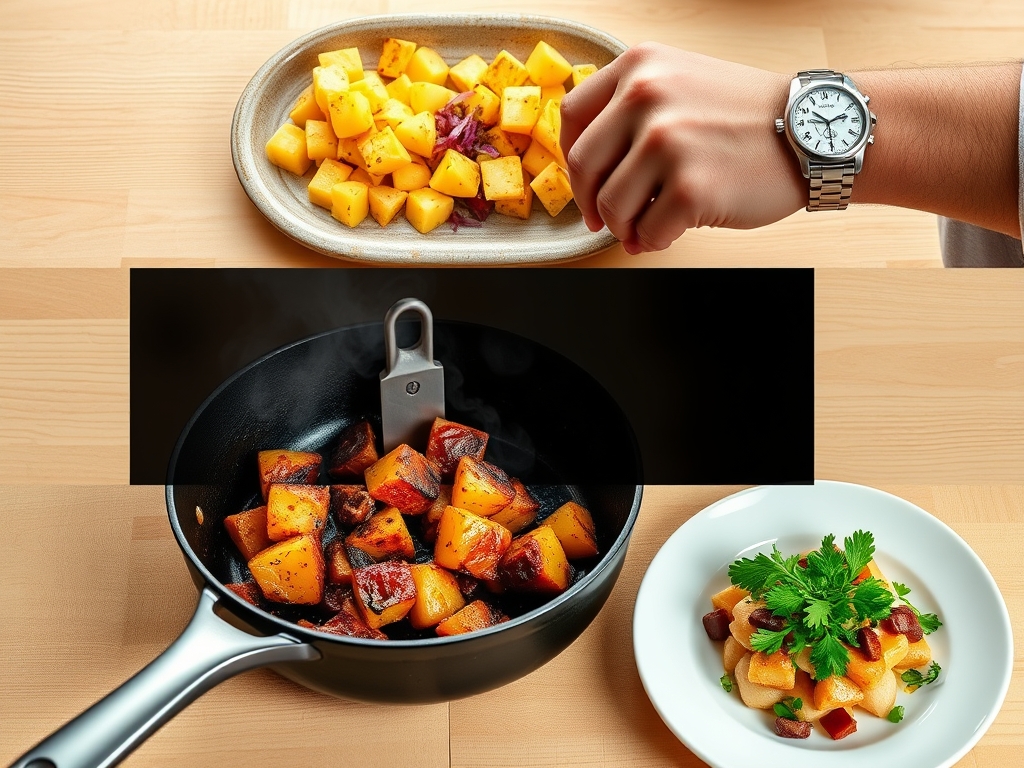
Efficiency in the kitchen is about the Chef's Flow. This entire process takes approximately 60 minutes from start to finish. Prep time accounts for 15 minutes of washing, peeling, and precise knife work. The active cooking time is 45 minutes.
The "Flow" dictates that you preheat your heavy-bottomed skillet or roasting pan while you prep. By the time your potatoes are cubed or sliced, your pan should be radiating heat. This prevents the potatoes from sticking and initiates immediate moisture evaporation. Always allow for a 5-minute resting period after cooking; this allows the internal starches to set so the butter does not simply run off the plate.
The Masterclass
1. The Precision Cut
Use a sharp chef knife or a bench scraper to ensure all potato pieces are uniform in size. This is not just for aesthetics; uniform surface area ensures every piece cooks at the exact same rate. If pieces are uneven, the small ones will turn to mush before the large ones are tender.
Pro Tip: This step manages thermal conductivity. Smaller pieces have a higher surface-area-to-volume ratio, meaning they brown faster but lose moisture quickly. Aim for 1-inch cubes for the perfect balance of crunch and fluff.
2. The Cold Water Rinse
Place your cut potatoes in a bowl of ice-cold water. Agitate them with your hands until the water turns cloudy. This removes excess surface starch which would otherwise turn gummy and sticky in the pan.
Pro Tip: Removing surface starch prevents enzymatic browning (oxidation) and allows for a cleaner sear. Pat them completely dry with a lint-free towel before they hit the fat; water is the enemy of a crisp crust.
3. The Initial Render
Heat a tablespoon of oil in your heavy-bottomed skillet. Once shimmering, add the potatoes in a single layer. Do not crowd the pan. Let them sit undisturbed for 5 to 7 minutes to develop a deep golden crust.
Pro Tip: This is the Maillard reaction in action. By not moving the potatoes, you allow the amino acids and reducing sugars to bond, creating hundreds of different flavor compounds and a structural "shell."
4. The Butter Baste
Once the potatoes are flipped, add your cold butter, garlic, and herbs. Use a large spoon to continuously pour the foaming butter over the potatoes. This is a classic French technique called arroser.
Pro Tip: The foaming action indicates that the water in the butter is evaporating. As the milk solids brown, they create a "beurre noisette" (brown butter) flavor profile that deeply penetrates the potato flesh.
5. The Aromatization
Use a microplane to zest a hint of lemon or grate a fresh clove of garlic over the pan in the final 60 seconds. The residual heat will bloom the oils in the zest without scorching them.
Pro Tip: Volatile aromatic compounds are heat-sensitive. Adding these "high notes" at the very end ensures the scent remains vibrant rather than cooking off into the exhaust fan.
6. The Deglaze
If the bottom of your pan has dark, flavorful bits (fond), add a splash of white wine or chicken stock. Use your tongs to swirl the potatoes through the resulting emulsion.
Pro Tip: This process captures the fond, incorporating those concentrated flavors back into a silky glaze that coats each potato, ensuring no flavor is wasted.
7. The Final Seasoning
Transfer the potatoes to a warm bowl and sprinkle with fine sea salt and cracked black pepper. The salt should be added while they are still glistening with fat so it adheres perfectly.
Pro Tip: Salt is a flavor magnifier. Adding it at the end prevents it from drawing out internal moisture during the roasting process, which would result in steaming rather than frying.
8. The Resting Phase
Let the potatoes sit for three minutes before serving. This allows the internal steam to redistribute, ensuring the center is creamy rather than watery.
Pro Tip: This accounts for thermal carryover. The internal temperature will continue to rise by a few degrees even after the potatoes leave the pan, finishing the cooking process gently.
The Deep Dive
Macro Nutrition: One serving of these butter-rich potatoes provides approximately 280 calories. You are looking at 35g of carbohydrates for energy, 14g of fats (mostly saturated from the butter), and 3g of protein. Potatoes are also an excellent source of potassium and Vitamin C.
Dietary Swaps: To make this Keto-friendly, swap the potatoes for cauliflower florets or radishes; both take on a mellow, earthy flavor when pan-seared in butter. For a Vegan version, use a high-quality olive oil and vegan butter substitute. This recipe is naturally Gluten-Free, provided your seasonings are pure.
The Fix-It:
- Soggy Potatoes: Usually caused by crowding the pan. Fix: Remove half the potatoes and finish them in two batches to allow steam to escape.
- Burnt Butter: If the butter turns black, the heat is too high. Fix: Add a splash of cold oil immediately to drop the temperature and stop the burning.
- Raw Centers: If the outside is dark but the inside is hard. Fix: Add two tablespoons of water to the pan and cover with a lid for 2 minutes to steam-finish them.
Meal Prep: To reheat and maintain "day-one" quality, avoid the microwave. Reheat in a 400-degree oven or an air fryer for 5 minutes. This re-activates the fats and recrisps the exterior skin through conduction.
The Wrap-Up
Mastering butter potato recipes is a rite of passage for any home cook. It is the perfect marriage of simple ingredients and sophisticated technique. By focusing on starch management and temperature control, you turn a grocery staple into a luxury side dish. Go forth, grab your favorite skillet, and remember: never be afraid of a little extra butter. Your taste buds will thank you for the indulgence.
The Kitchen Table
Which potato is best for buttery recipes?
Yukon Gold potatoes are the gold standard. They have a naturally creamy texture and a medium starch content that holds its shape while absorbing butter beautifully. Russets are better for fluffy mashes but can fall apart when pan-seared.
Why do my potatoes stick to the pan?
Potatoes stick when the pan is not hot enough or if they contain too much surface moisture. Always preheat your skillet and pat the potatoes dry with a towel before adding them to the hot fat to ensure a clean release.
Can I use salted butter for roasting?
Yes, but be cautious with additional seasoning. Salted butter contains varying amounts of salt depending on the brand. It is safer to use unsalted butter so you have total control over the final flavor profile of your dish.
How do I get the crispiest edges?
The secret is the "par-boil and shake" method. Boil the potatoes for five minutes, drain, and shake them in the pot to roughen the edges. These fuzzy bits create more surface area for the butter to crisp up.
How long do leftover butter potatoes last?
Leftovers will stay fresh in an airtight container in the refrigerator for up to four days. For the best texture, reheat them in an oven or air fryer rather than a microwave to restore their signature buttery crunch.