
The sound of a boneless, skinless chicken breast hitting a preheated stainless steel pan is sharp, almost musical, followed by the immediate release of steam and the first whisper of caramelization. That simple protein transforms into nine distinct dishes when you understand heat control, acid balance, and strategic seasoning. These simple chicken recipes breast variations rely on foundational techniques that produce restaurant-quality results in under 30 minutes, no culinary degree required.
Chicken breast suffers from a reputation problem. Overcooked into rubbery submission in countless home kitchens, it becomes the bland centerpiece of uninspired weeknight dinners. The reality is different: properly handled, this lean cut develops complex flavor through the Maillard reaction, absorbs marinades efficiently due to its mild taste, and offers a blank canvas for bold spice profiles, citrus-forward sauces, and umami-rich glazes.
The Gathers
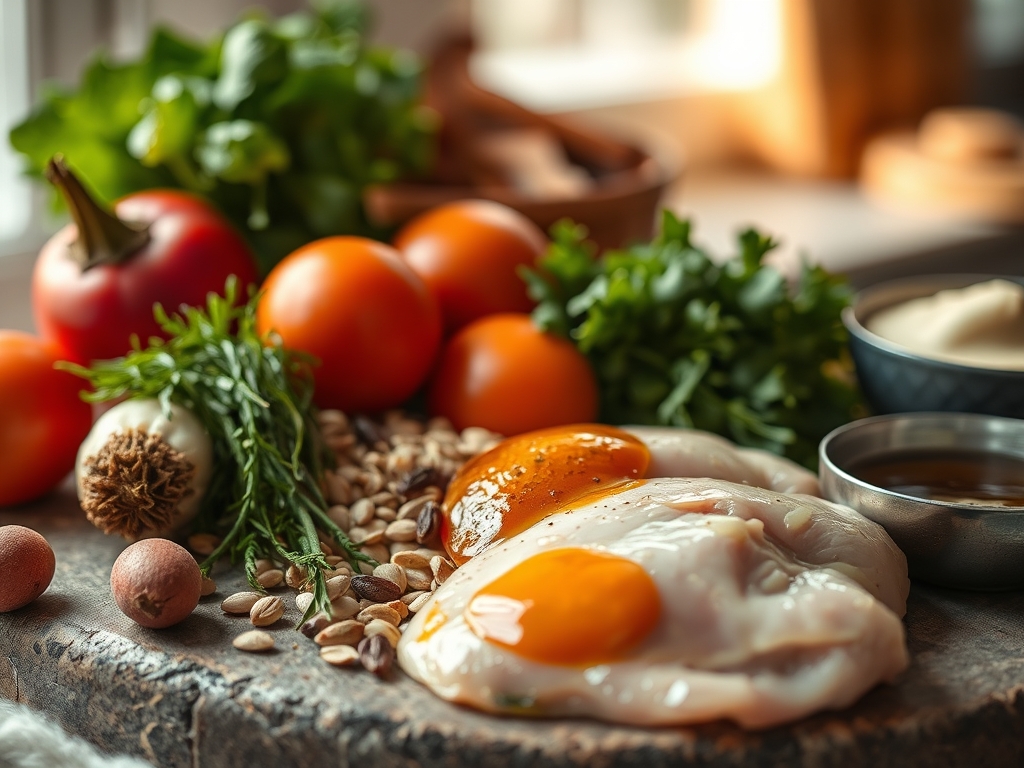
As you see in the ingredient spread below, the raw chicken breasts should appear pale pink with minimal surface moisture. Pat them completely dry with paper towels; residual water creates steam instead of sear, preventing that golden crust. Each breast weighs approximately 170-200g after trimming.
Core Ingredients:
- 4 boneless, skinless chicken breasts (6-8 oz each)
- Neutral oil with high smoke point (avocado, grapeseed, or refined sunflower)
- Kosher salt and freshly cracked black pepper
- Aromatics: garlic cloves, shallots, fresh herbs (thyme, rosemary, parsley)
- Acid component: lemon juice, white wine, or apple cider vinegar
- Enrichment options: butter, heavy cream, or coconut milk
Smart Substitutions:
Swap chicken thighs if you prefer more forgiveness during cooking; their higher fat content tolerates heat better. Replace butter with ghee for dairy-sensitive eaters. Substitute bone broth for wine when cooking alcohol-free, adding a splash of vinegar to mimic acidity. Fresh herbs can give way to dried at a 3:1 ratio, though the aromatic punch diminishes.
The Clock
Prep Time: 12 minutes
Cook Time: 15-18 minutes
Total Time: 27-30 minutes
Chef's Flow:
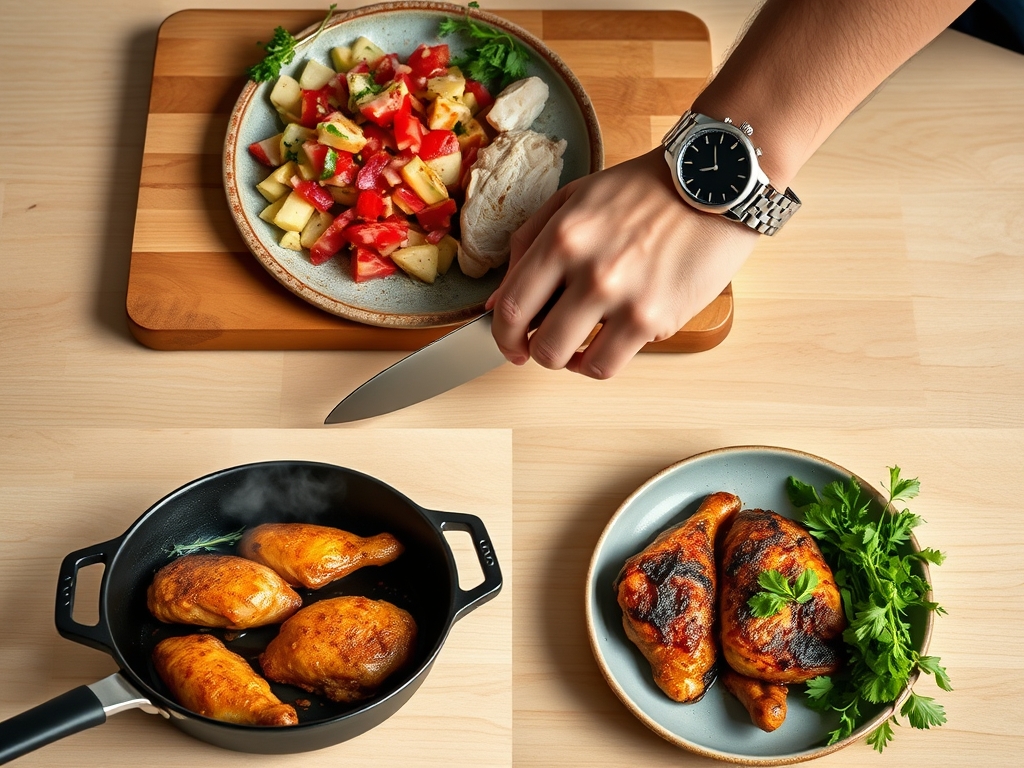
While the pan preheats over medium-high for 3 full minutes, pound thicker breast portions to uniform 1.5-inch thickness using a meat mallet. This ensures even cooking and prevents the dreaded dry edges with raw center syndrome. Measure and prep aromatics during the first sear side, approximately 5-6 minutes. Momentum matters: have your sauce ingredients within arm's reach before the protein hits the pan.
The Masterclass
Step 1: The Uniform Thickness Protocol
Place each breast between plastic wrap or parchment sheets. Use firm, controlled strikes with the flat side of a meat mallet, working from the thickest center toward the tapered edges. Target 1.5 inches throughout.
Why It Works: Heat penetrates at a predictable rate of approximately 1-2mm per minute depending on temperature. Uniform thickness means uniform doneness; you eliminate the guesswork and hit that perfect 165°F (74°C) internal temperature simultaneously across the entire cut.
Step 2: The Aggressive Seasoning Phase
Season both sides with more salt than feels comfortable, roughly 3/4 teaspoon of kosher salt per breast. Add pepper immediately after. Let rest 10 minutes at room temperature if time permits.
Chef's Secret: Salt draws moisture to the surface initially, then pulls it back in, carrying seasoning deep into the muscle fibers. This brief rest period also takes the chill off, reducing the thermal shock when the meat meets the hot pan and promoting even cooking.
Step 3: The Sear Commitment
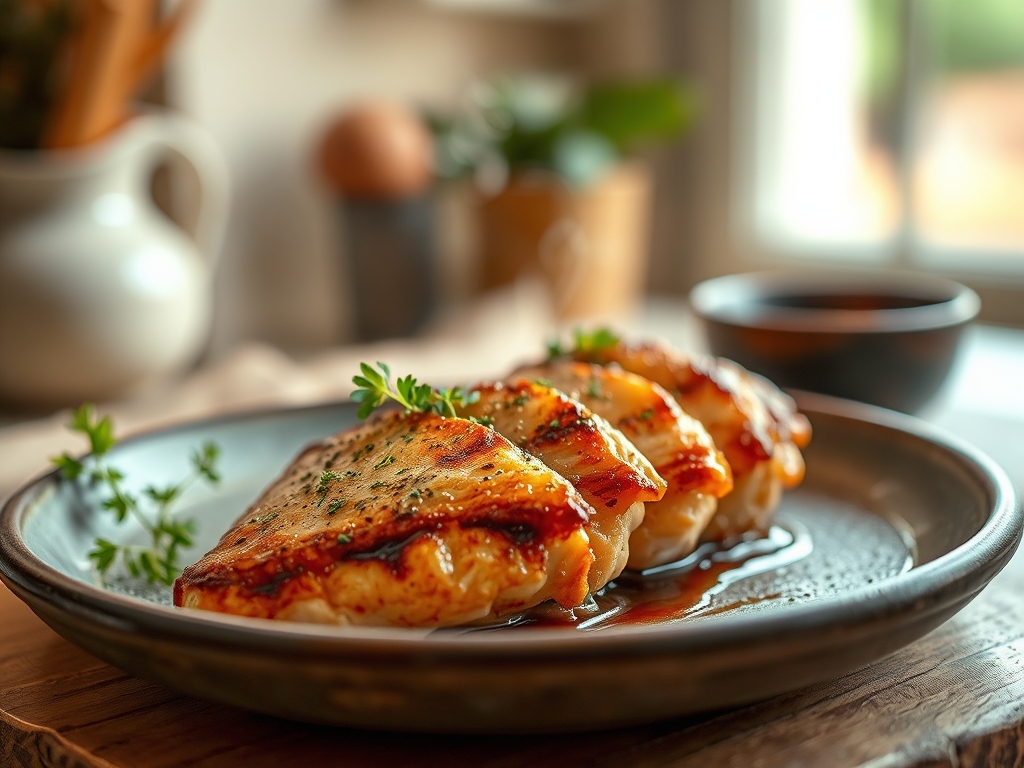
Heat 2 tablespoons oil in a heavy-bottomed skillet until it shimmers and barely begins to smoke (around 375-400°F/190-204°C). Lay breasts down gently, presentation side first. Do not move them for 5-6 minutes.
Why It Works: Proteins need sustained contact with hot metal to denature and caramelize. Movement breaks that connection. Note the texture shown in the step-by-step photos: the golden-brown crust forms only where undisturbed contact occurs. That's the Maillard reaction creating hundreds of new flavor compounds.
Step 4: The Flip and Finish
Turn once when the first side releases easily and shows deep golden color. Cook second side 4-5 minutes. Internal temperature should read 160°F (71°C) when you pull them.
Chef's Secret: Carryover cooking adds another 5-7 degrees during the rest period. Pulling at 160°F prevents the dry, chalky texture of overcooked chicken while remaining food-safe. The USDA approves 165°F as an instant-kill temperature, but 160°F held for 15 seconds achieves identical safety.
Step 5: The Sauce Build
Remove chicken to a plate, tent with foil. Add minced shallots or garlic to the residual fat, cook 30 seconds until fragrant, then deglaze with 1/2 cup wine or broth. Scrape browned bits. Reduce by half, add butter or cream if using.
Why It Works: Those stuck-on bits (fond) contain concentrated proteins and sugars, pure umami. Deglazing dissolves them into your sauce, building complexity impossible to achieve with commercial bases.
Nutritional Info
Per serving (one 6 oz breast with basic seasoning, no sauce):
- Calories: 185
- Protein: 35g
- Fat: 4g
- Carbohydrates: 0g
- Fiber: 0g
Adding pan sauce with butter increases fat by approximately 7-10g per serving. Cream-based variations push calories to 280-320 depending on portion size.
Dietary Swaps
Keto-Friendly: The base preparation already fits. Amplify fat with compound butters (herbs mixed into softened butter) or finish with heavy cream reductions. Serve over cauliflower rice or zucchini noodles.
Paleo: Use ghee instead of butter, coconut aminos in place of soy-based additions, and keep sauces simple with bone broth and fresh herbs.
Gluten-Free: Already compliant unless you add thickeners. Replace flour-based roux with cornstarch slurries (1 tablespoon cornstarch to 2 tablespoons cold water) or reduce sauces naturally through evaporation.
Vegan Pivot: Substitute extra-firm tofu, pressed and sliced into 1-inch planks. The technique translates: dry thoroughly, season aggressively, sear without movement. Cooking time drops to 3-4 minutes per side.
Serving & Presentation
Rustic Bistro: Slice on the bias into 1/2-inch strips. Fan over a bed of dressed arugula with shaved Parmesan and toasted pine nuts. Drizzle reduced pan sauce in a tight zigzag pattern.
Modern Minimalist: Serve the breast whole, slightly off-center on a white plate. Pool sauce on one side. Add three perfectly turned vegetables (carrots, fingerling potatoes) for color contrast. Garnish with a single herb sprig.
Family-Style Abundance: Arrange sliced chicken down the center of a large platter. Surround with roasted seasonal vegetables, lemon wedges, and a small bowl of extra sauce. Scatter fresh herbs over everything for visual pop.
The Pro-Dodge
Pitfall 1: Cooking from Cold
Chicken straight from refrigeration creates uneven cooking. The exterior overcooks while the center lags behind. Fix: Rest at room temperature 15-20 minutes before cooking, or extend cooking time by 3-4 minutes and monitor temperature closely.
Pitfall 2: Overcrowding the Pan
Too many breasts drop pan temperature dramatically, causing steaming instead of searing. Fix: Work in batches, maximum two breasts in a 12-inch skillet. Keep finished pieces warm in a 200°F (93°C) oven.
Pitfall 3: Skipping the Rest
Cutting immediately releases all accumulated juices onto the cutting board instead of redistributing through the meat. Fix: Always rest 5 minutes minimum after cooking. The fibers relax and reabsorb moisture, producing noticeably juicier results.
The Meal Prep Corner
Cooked chicken breast holds 3-4 days refrigerated in an airtight container. Separate sauce if making ahead; the protein absorbs liquid during storage, becoming soggy.
Reheating for Day-One Quality:
Avoid microwaves; they create rubbery texture through uneven steam heating. Instead, place sliced chicken in a covered skillet with 2 tablespoons of water or broth over medium-low heat for 3-4 minutes. The gentle steam and indirect heat revive moisture without overcooking. Alternatively, reheat in a 300°F (149°C) oven for 8-10 minutes, covered with foil.
Freeze cooked chicken up to 3 months. Thaw overnight in the refrigerator, then reheat using the skillet method.
The Wrap-Up
These nine variations, from lemon-caper piccata to honey-garlic glaze to blackened Cajun spice rubs, all spring from the same foundational technique: controlled heat, proper seasoning, and respect for carryover cooking. Once you internalize the core method, ingredient swaps become intuitive, turning a simple Tuesday dinner into something memorable. Master the basics, then experiment fearlessly. Share your favorite variation or personal twist in the comments; this community thrives on shared kitchen wisdom.
The Kitchen Table
How do I know when chicken breast is done without a thermometer?
Press the thickest part with your finger. It should feel firm with slight resistance, similar to the flesh at the base of your thumb when making a gentle fist. However, invest in an instant-read thermometer; guessing risks food safety. Target 160°F (71°C) for carryover to 165°F.
Can I marinate chicken breast overnight?
Yes, but acidic marinades (lemon juice, vinegar) begin denaturing proteins after 2 hours, creating mushy texture if left too long. For overnight marinades, use oil-based blends with minimal acid, or switch to yogurt-based marinades where enzymatic action is gentler.
Why does my chicken stick to the pan?
Insufficient preheating, too little oil, or moving the meat before the sear develops. Heat the pan 3 full minutes, use enough oil to coat the bottom, and resist the urge to peek. The chicken releases naturally once proper crust forms.
What's the best pan for cooking chicken breast?
Stainless steel or cast iron retain heat better than nonstick, producing superior searing. If using nonstick, choose one rated for high heat (above 400°F/204°C) and accept slightly less caramelization in exchange for easier cleanup.
How do I prevent dry chicken breast every time?
Three factors: uniform thickness (pound it), correct final temperature (160°F, not 165°F), and mandatory rest period (5 minutes minimum). Overcooking is the primary culprit; even perfect technique cannot salvage chicken cooked to 180°F.