
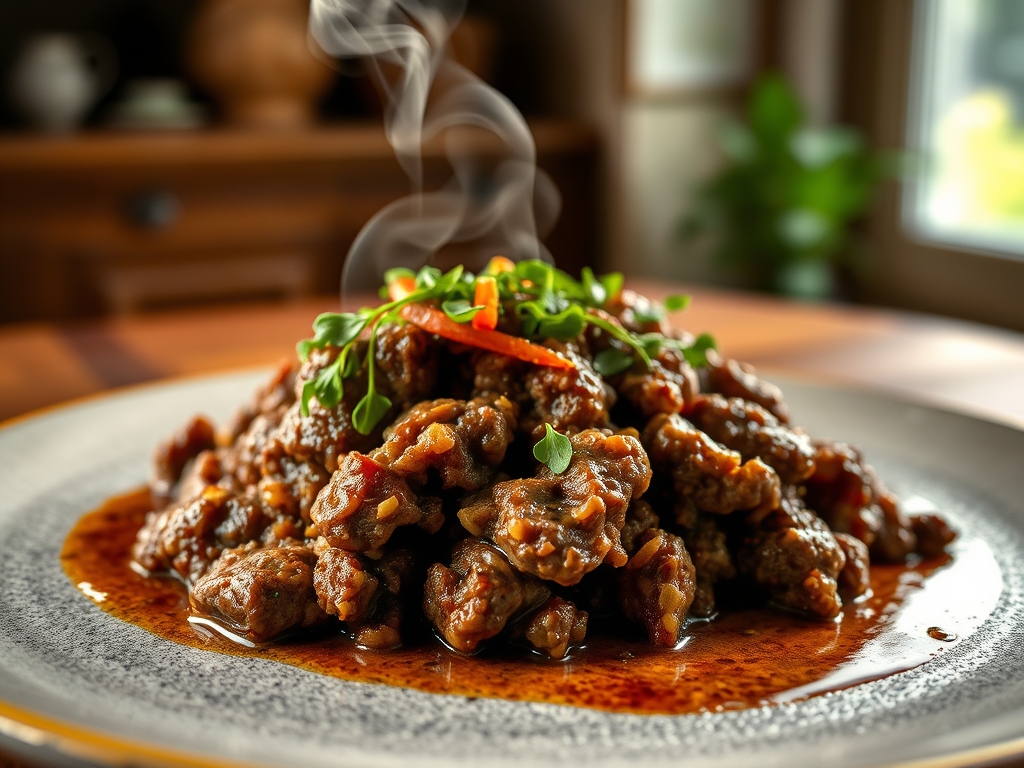
Picture a heavy-bottomed cast iron skillet resting on a stovetop; its surface is shimmering with a thin veil of oil just before the meat hits the metal. There is a specific, violent hiss that occurs when protein meets high heat; it is the sound of the Maillard reaction beginning its transformative work. When you are hunting for the ultimate comfort food, ground beef recipes pioneer woman style offer that perfect intersection of ranch-hand hearty and culinary precision. We are talking about deep, mahogany browning; lush, velvet gravies; and that nostalgic aroma that seems to anchor a home.
Ground beef is the workhorse of the American kitchen, but it is often treated with a lack of technical respect. To master these seven iconic classics, we have to look past the patty and understand the cellular structure of the meat. We are manipulating fats, proteins, and connective tissues to create textures that range from the crumbly perfection of a taco filling to the structural integrity of a world-class meatloaf. It is time to stop just cooking dinner and start engineering flavor. Grab your favorite apron and a glass of wine; we are going deep into the science of the sear.
The Gathers:
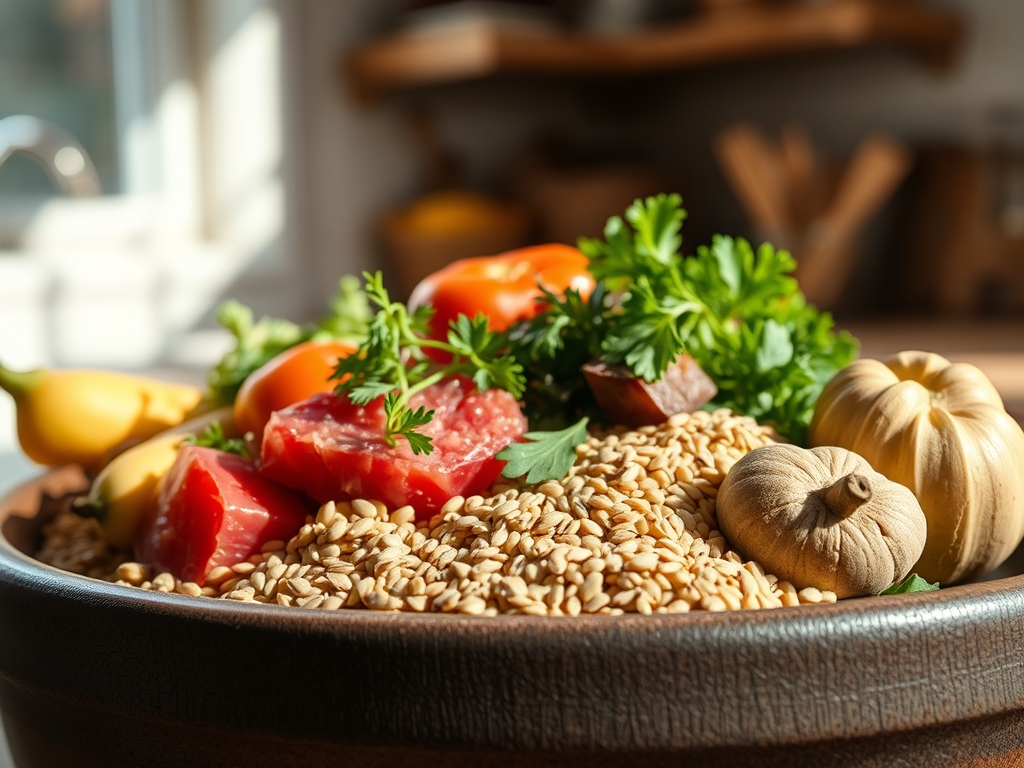
To execute ground beef recipes pioneer woman favorites with professional flair, your mise-en-place must be impeccable. Start with the beef itself; aim for an 80/20 lean-to-fat ratio. This 20 percent fat content is not just for flavor; it provides the lubrication necessary to prevent the proteins from tightening into dry, rubbery knots during the rendering process. You will need a piquant blend of aromatics: yellow onions for their high sugar content (essential for caramelization), garlic cloves ready for the microplane, and bell peppers to add a bright, vegetal snap.
Your pantry staples should include high-quality Worcestershire sauce for an umami punch and tomato paste to add a viscous, concentrated base to your sauces. Smart Substitutions: If you find yourself without heavy cream for those famous gravies, a dollop of Greek yogurt can provide the necessary lactic acid tang, though you must whisk it in off-heat to prevent curdling. For a gluten-free binder in meatloaf or meatballs, toasted almond flour provides a similar structural matrix to breadcrumbs without the wheat. Always keep a bottle of dry red wine nearby to deglaze your pans; the acidity helps dissolve the fond (those delicious brown bits) back into your sauce.
The Clock
The "Chef's Flow" is all about managing thermal momentum. For most of these classics, you are looking at a 15-minute prep window followed by a 30 to 45-minute cook time. The secret to efficiency is multitasking during the rendering phase. While the beef is browning in your heavy-bottomed skillet, use that time to aerate your dry ingredients or dice your aromatics with a sharp chef's knife.
Total time usually clocks in at one hour, but remember that meat requires a rest period. Just as a steak needs to redistribute its juices, a beef-based sauce or loaf needs five to ten minutes of "carryover" time to allow the protein fibers to relax and reabsorb moisture. If you rush the plate, you will end up with a puddle of liquid rather than a cohesive, luscious sauce.
The Masterclass
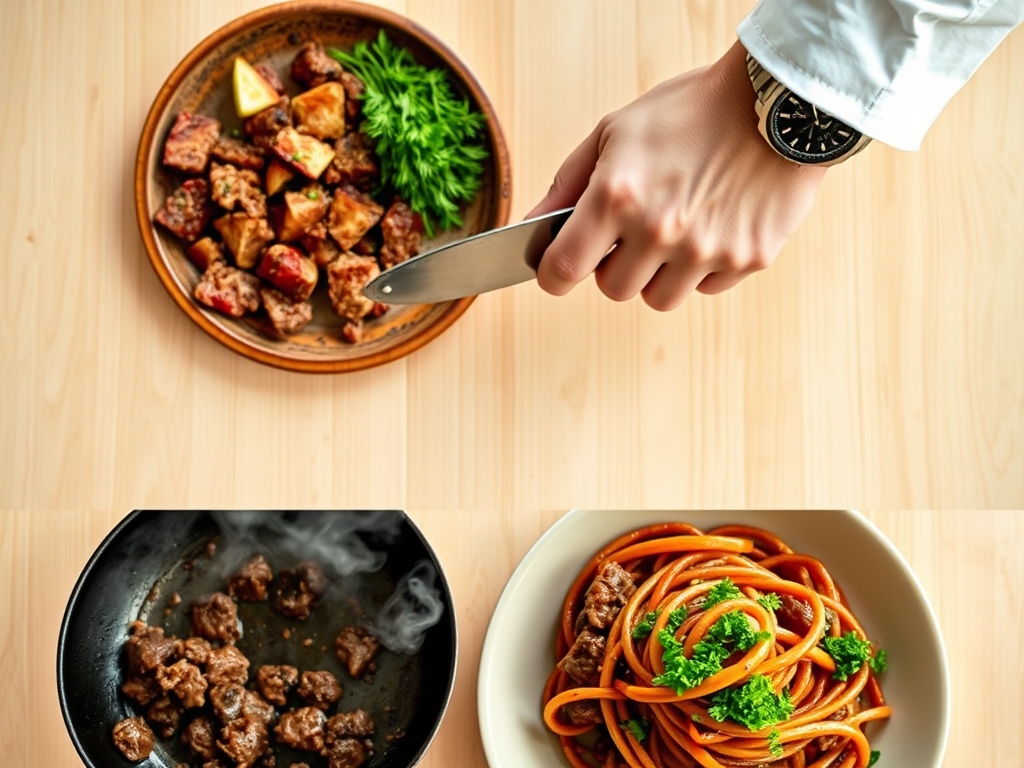
1. The Perfect Sear and Render
Begin by preheating your skillet until it is wispy with smoke. Add the beef in chunks rather than a flat sheet to maximize the surface area exposed to the heat. Use a stiff wooden spoon or a specialized meat masher to break the clumps into uniform morsels.
Pro Tip: This stage relies on Evaporative Cooling. If you crowd the pan, the moisture escaping the meat will turn into steam, boiling the beef instead of searing it. Work in batches to ensure a deep, mahogany crust.
2. Deglazing the Fond
Once the meat is browned and removed, you will see a layer of caramelized proteins stuck to the bottom. This is the "fond." Add your onions and a splash of liquid (stock or wine), using a bench scraper or spatula to lift those bits.
Pro Tip: This is Deglazing. The alcohol or acid in your liquid acts as a solvent, capturing the concentrated flavor molecules created during the browning process and infusing them back into the base of your dish.
3. Building the Flavor Base
Add your tomato paste and spices directly to the hot fat in the center of the pan. Cook them for two minutes until the paste turns from bright red to a rusty brick color.
Pro Tip: This technique is called Blooming. Many flavor compounds in spices are fat-soluble; heating them in oil "wakes up" the volatile oils, resulting in a more fragrant and complex end product.
4. Emulsifying the Sauce
Slowly pour in your liquids (broth, cream, or crushed tomatoes) while whisking constantly. Bring the mixture to a gentle simmer, never a rolling boil.
Pro Tip: Maintaining a low simmer prevents the Denaturation of dairy proteins. High heat can cause the fats to separate from the solids, leading to a grainy or oily texture in your sauce.
5. The Binding Phase
For recipes like meatloaf or meatballs, fold in your binders (eggs and crumbs) by hand. Over-mixing will lead to a dense, hockey-puck consistency.
Pro Tip: Gentle mixing preserves the Intercellular Spaces within the meat mixture. These tiny pockets trap steam and rendered fat during cooking, ensuring the final result is light and juicy.
6. Managing Thermal Carryover
Remove your beef from the heat source when it is about 5 degrees below your target internal temperature. Cover it loosely with foil.
Pro Tip: Thermal Carryover occurs because the exterior of the meat is hotter than the interior. That residual heat continues to move inward even after the pan is off, finishing the cook perfectly without drying out the edges.
7. The Final Infusion
Finish your dish with a handful of fresh herbs (parsley or chives) and a final squeeze of lemon juice or a dash of vinegar right before serving.
Pro Tip: This is about Brightness Calibration. The acidity cuts through the heavy fats of the beef, lifting the flavor profile and preventing the dish from feeling "muddy" on the palate.
The Deep Dive
From a macro nutrition perspective, ground beef is an iron powerhouse, packed with B12 and high-quality protein. To keep it keto-friendly, simply swap out the starch for riced cauliflower or zoodles. For a vegan twist that mimics the Pioneer Woman style, use a walnut and mushroom crumble; the mushrooms provide the necessary glutamate for that savory umami hit.
The Fix-It:
- Greasy Sauce: If your sauce looks oily, use a bread slice to blot the surface or toss in a small ice cube; the fat will cling to the cold surface for easy removal.
- Bland Meat: This usually means a lack of salt during the browning phase. Salt draws out moisture, which then evaporates to concentrate flavor. Season early and often.
- Tough Meatballs: You likely over-worked the protein. Next time, chill the meat before forming to keep the fats solid until they hit the oven.
Meal Prep: When reheating, add a tablespoon of water or broth before microwaving. This creates a "steam jacket" that rehydrates the proteins, preventing that rubbery "leftover" texture.
The Wrap-Up
Mastering ground beef recipes pioneer woman style is about more than just following a list of ingredients; it is about understanding the chemistry of the kitchen. By focusing on the sear, the deglaze, and the rest, you transform a humble pound of meat into a masterpiece of comfort. These dishes are designed to be shared, so invite the neighbors, set the table, and enjoy the fruits of your scientific labor.
The Kitchen Table
How do I prevent ground beef from steaming in the pan?
Avoid overcrowding the skillet. Cook the meat in two batches and ensure the pan is smoking hot before adding the beef. This allows moisture to evaporate instantly, facilitating a proper Maillard reaction for a deep brown crust.
Can I freeze Pioneer Woman beef dishes?
Yes, most ground beef recipes freeze beautifully. Ensure the dish is completely cooled to room temperature to prevent ice crystal formation. Store in airtight containers for up to three months; thaw in the refrigerator overnight before reheating gently.
What is the best way to drain excess fat?
Carefully tilt the skillet and use a crumpled paper towel held with tongs to soak up the rendered fat. Alternatively, use a slotted spoon to transfer the browned meat to a plate lined with paper towels before building your sauce.
Why is my meatloaf falling apart?
A crumbling meatloaf usually lacks enough binder or was sliced too soon. Ensure you use the correct ratio of eggs and breadcrumbs. Crucially, let the loaf rest for ten minutes after baking to allow the proteins to set firmly.